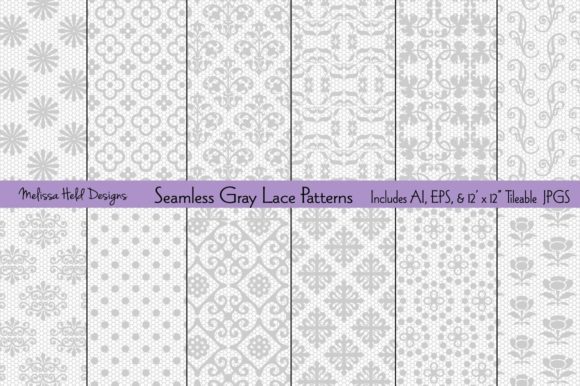
Seamless Gray Lace Patterns: A Practical Guide to Choosing and Using Them Effectively
When you come across a collection like Seamless Gray Lace Patterns by Melissa Held Designs, it is easy to assume that the hardest part is already done. After all, the work of creating twelve delicate, light gray lace patterns is handled for you. The files are there—AI, EPS, and tileable JPGs—ready to drop into your project. But the difference between a design that looks deliberately polished and one that feels like an afterthought often comes down to a few choices made right at the start. Even with a resource this versatile, small missteps can diminish the final result.
The patterns themselves are 12 x 12 inches, carefully constructed to repeat seamlessly, and packaged with both an expanded pattern and a swatch layer. They work well for gift wrap, scrapbook paper, home decor, baby-themed products, and countless other paper and digital design projects. Yet, the same flexibility that makes them attractive also introduces a handful of common mistakes that many users—from beginners to experienced professionals—tend to overlook.
Mistake 1: Assuming the JPGs Are Print-Ready Without Checking Resolution
The collection includes twelve JPGs that are tileable at 12 x 12 inches. That is a generous size for many projects, but tileable does not automatically mean suitable for every application. A common misunderstanding is that a standard JPG at that size is enough for large-format printing. It can be, but only if you are mindful of the output dimensions and the viewing distance.
If you stretch a 12-inch JPG to cover a 24-inch roll of gift wrap or a poster, the resolution drops by half. The lace detail, which relies on fine lines and subtle gray tones, can become soft or pixelated. This is where the editable AI and EPS files become essential. Working from a vector source allows you to scale the pattern up without losing crispness. The person who opens the AI file first, resizes the pattern proportionally, and then exports a high-resolution raster will get a noticeably sharper print.
Better approach: For any project that might exceed the original 12-inch tile, start with the vector file. If you are printing on a home inkjet at standard sizes, the JPGs are perfectly adequate. For professional printing or larger formats, always use the AI or EPS files and export at 300 DPI or higher.
Mistake 2: Ignoring the Editable Layers and Swatch Files
Another detail that often goes unused is the layer structure inside the AI and EPS files. Each file contains an expanded pattern layer and a swatch. Many people open the file, see the pattern, and export it as is. They miss the opportunity to customize the color, opacity, or scale of the lace, which is precisely what the editable format is designed for.
The gray in these patterns is a deliberate, soft light gray, not a neutral gray. That means it works beautifully in monochromatic and pastel palettes, but it also means you can shift it to fit a brand or mood. Maybe you need a warmer tone for a baby shower invite or a cooler, more architectural gray for home decor. The editable files allow that. The swatch layer makes it simple to apply the pattern to different shapes or backgrounds without recreating the repeat from scratch.
Better approach: Before you drop a JPG into your project, spend ten minutes exploring the AI or EPS file. Adjust the color if the mood calls for it. Use the swatch to fill custom vector shapes. This small habit turns a static texture into a flexible design tool.
Mistake 3: Choosing a Lace Pattern That Blends Into the Background
Because these patterns are light gray, they rely on contrast to read properly. A common frustration occurs when someone applies the pattern to a similarly light or medium gray background. The lace details, which are elegant and intricate, simply disappear. The same thing can happen if the pattern is used on a textured paper that competes with the fine lines.
This is not a flaw in the patterns themselves. Light gray lace is intentionally subtle. It is meant to add texture and depth without overwhelming a layout. But if you are designing a product where the lace needs to be clearly visible—like on a greeting card or a fabric swatch—you need to pair it with a background that offers enough tonal separation. A white or very pale cream background lets the light gray lines shine. A bold dark background, such as navy or charcoal, makes the lace pop in a completely different way, giving it a sophisticated, almost ethereal look.
Better approach: Test the pattern on at least three different backgrounds before committing. Place it on white, on a medium tone, and on a dark tone. This will show you how the pattern behaves in different contexts. For products where subtlety matters, a light background is your friend. For maximum visibility, go darker.
Mistake 4: Overlooking the Niche Appeal and Limiting Applications Unnecessarily
It is easy to look at a lace pattern and think it belongs only in feminine, romantic, or baby-themed projects. That is a limiting assumption. These seamless gray lace patterns have a restrained, architectural quality that works well in modern home decor, minimalist branding, and even tech accessories. The key is how you apply them.
A lace pattern used as a subtle background on a website header or as an overlay on product photography can add elegance without shouting. Entrepreneurs and small business owners sometimes avoid lace because they think it is too specific, but a light gray, geometric lace pattern can complement a wide range of aesthetics—from vintage to contemporary. The mistake is pigeonholing the resource before you have experimented with its possibilities.
Better approach: Set aside fifteen minutes to brainstorm projects you might not normally associate with lace. Consider using the pattern as a watermark, a subtle texture on packaging, or a repeating element in social media templates. The mockups included in the collection (courtesy of Graphicburger and Barnimages) can help you visualize these applications quickly.
Mistake 5: Forgetting to Test the Seamless Repeat at Actual Production Size
Seamless patterns can behave unpredictably when scaled or placed in unusual aspect ratios. Even though the files are designed to tile perfectly at 12 x 12, the repeat might look different when applied to a long, narrow rectangle like a bookmark or a vertical banner. The repeat might feel too tight or too loose, or the visible seam might become noticeable if the tile is not aligned correctly.
This mistake is especially common when people rely solely on the preview without testing the pattern in the actual layout. The preview often shows a small section that looks flawless, but the full implementation reveals alignment issues or an unintended visual rhythm.
Better approach: Always duplicate the tile in your layout software to cover at least two full repeats in each direction. Zoom out and look at the overall visual flow. If the repeat looks mechanical or draws attention to itself, adjust the scale using the editable files. A slight resize—even 5 or 10 percent—can make the pattern feel organic and custom-fit to your project.
What to Check Before You Buy or Download
If you are evaluating this collection or a similar one, there are a few specifics to confirm early. First, make sure your software supports AI and EPS files. Most professional design applications do, but some older or free alternatives may not. The JPGs are a safe fallback, but you lose the editing freedom.
Second, look at the mockups included. The collection mentions mockups from Graphicburger and Barnimages. These are not just decoration—they give you a realistic sense of how the pattern behaves on physical objects like gift wrap or paper products. Use them as a decision-making tool, not just a preview.
Third, consider the color temperature of the gray. Is it a warm gray or a cool gray? The collection describes it as light gray, but if your project requires a truly neutral or specific undertone, you will want to adjust it using the editable files. That is an advantage, not a limitation, but only if you know to look for it.
Practical Workflow Tips
- Start with the vector file (AI or EPS) for any project that may need resizing or recoloring. Keep the JPGs for quick mockups or small-scale digital use.
- Create a pattern swatch in your software so you can apply the lace to multiple shapes and layers without reimporting. This saves time and keeps the repeat consistent.
- Test contrast early. Place the pattern on backgrounds you are likely to use and adjust opacity if needed. The light gray can be layered over photos or solid colors for a subtle effect.
- Keep the original files organized. Name them clearly by pattern style so you can find the right lace for each project without opening every file.
- Use the mockups to communicate with clients or collaborators. A realistic preview of the pattern on a product reduces back-and-forth and helps everyone see the final vision.
A Balanced Perspective on Value
A collection like Seamless Gray Lace Patterns is not a magic solution. It is a thoughtful starting point. The patterns are well-crafted, but the final quality depends on how you handle scale, contrast, editing, and context. The difference between a generic lace overlay and a design element that feels intentional is the attention you give to those details.
For professionals who need reliable, editable textures, the vector files are the real asset. For hobbyists and small business owners who want quick, attractive results, the JPGs will serve most standard projects well. The key is knowing which file to use when and being willing to adjust the pattern to fit your specific needs rather than forcing it into a layout where it does not quite belong.
By avoiding the common pitfalls—skipping the vector files, ignoring the swatch layer, choosing the wrong background, limiting applications before experimenting, or failing to test the repeat at production size—you will get more consistent, satisfying results. That is true whether you are designing a single piece of scrapbook paper or building a coordinated product line.
The patterns are there to make your work easier. The rest is up to how you use them.